


How to design and build your own PC – and why you should
A few weeks on from building my first PC from scratch, I thought I’d offer some thoughts and tips to help other first-time system builders go from big ideas to the big switch-on.
The evening of June 15th was a tense one. I came home from work, ripped open the parcel I’d collected from the local newsagent, and carefully transplanted my PC components from the motherboard in my case to the new one. Then I screwed everything back together, connected my Windows installation USB stick, and hit the power button, hoping for more success than I’d had the week before when a compatibility issue stopped the system from booting…
I’d never been happier to see a blue screen. That language selection box – the first step to installing Microsoft’s operating system – meant my machine was alive. This was my first desktop computer for a decade. This was a more professional setup to write code and blog posts from. This was a box that could play ten year-old games at more than five frames per second. And I’d built it with my own two hands.
There are still some issues for me to work out and a lot of optional extras I’d like to add, but building my own PC has already been a rewarding and educational experience, and I thought I’d share some of the things I’ve learnt and some tips for other first timers…
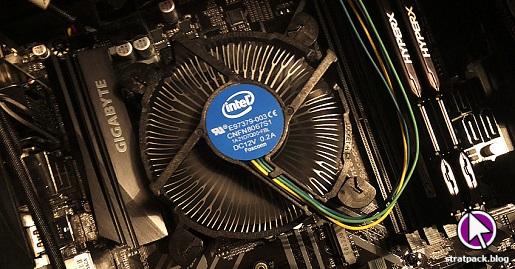
Step 1: Choose your processor and a compatible motherboard
As with most aspects of PC building, there’s a lot of debate over which type of processor is best. I eventually went with an eighth-generation Intel Core i7, but whatever you end up choosing, this will be one of the most important calls you will make.
Make a note of the socket type your processor of choice fits, and choose a motherboard that’s specifically listed as supporting your model. I wasted a week and a little bit of money because my first motherboard didn’t support Intel’s eighth generation.
Other considerations when picking a board are the number and size of the expansion slots (for various components, but most importantly your graphics card), as well as the number of SATA sockets for connecting hard drives and the amount and type of RAM that is supported.
Step 2: Get the basics in place
Next up come some of the fundamentals of your new system. First, choose a case. Aesthetics are your main consideration here, but make sure it’s the right size to hold your motherboard.
The first thing to go inside should be your power supply. The wattage is the most important detail – a 550W unit like mine should be enough unless you’re building an absolute beast.
Finally, think about any expansion cards you’ll need for basic utilities. My desk is too far away from my router for an ethernet connection, so for me this meant fitting a PCIe WLAN card.
Step 3: Fit your memory
A PC contains two types of memory: random access memory (RAM) for use in quick operations, and a hard disk or solid state drive (SSD) for longer-term storage.
Your RAM loadout will depend on your plans for your new PC, but 8GB or 16GB will be enough for most users. It won’t hurt to leave a bit of space for a future upgrade, either, so perhaps leave a couple of slots free if your configuration allows.
For long-term storage, SSDs offer an edge over hard drives on speed, but come at a higher price. If you don’t want to splash out quite so much, you can use an SSD for your operating system and applications and a hard drive for your documents, music and images.
Step 4: Choose a graphics card
This will be the hardest choice for gamers. Graphics cards range for tens of pounds to thousands of pounds, and prices have been exceptionally high in recent years due to the role of GPUs in cryptocurrency mining (they’re great at making complex calculations very quickly).
There are many resources out there that will offer far more in-depth advice than I can offer in a brief blog post, but the important thing when choosing a graphics card is simply to find the price point that’s right for you and stick to it. Do your research, shop around, and get the best performance you can squeeze out of those pennies.
Step 5: Ongoing development
At this point, you’ll have a PC that you can (hopefully) boot and install an operating system on. From there, you’ll likely find you’ve developed a brand new hobby as you continue to make small tweaks and additions to your system for years to come.
One of the most important aspects to consider early on is cooling. Your case and processor probably came with fans, but install a utility that lets you keep an eye on the temperature of your components (I use CAM) and keep an eye on its output, particularly if you run fairly demanding games that are likely to heat things up a bit.
Beyond that, the potential for your system is only as big as your imagination (and your wallet). From LEDs that do nothing but make your case look pretty to upgrades to your initial specs and even virtual reality headsets, there’s an endless array of extra hardware for you to explore and experiment with. Enjoy, and try not to break too much!
Preparation, budgeting, and other tips
The above should be enough to get you thinking, but I’d also offer the following tips on the general PC building process to anyone setting out to build their first system:
- Plan ahead and have a budget. Know what you want your new system to do and how much you can afford to invest, and stick to these limits. If you buy components on a whim then the cost is likely to spiral out of control.
- Do your research. Read up on the parts you’re considering. Make sure they do what you need them to do and that they’re all fully compatible with each other.
- Leave space to upgrade. Choosing between a £40 motherboard that’ll accommodate your current configuration and a £70 one that gives you room to grow in future? Go for the latter if you can, or you might regret it later.
- Ground yourself. Some PC components are very sensitive to static electricity. Fit your power supply first and plug it in, but leave it turned off. If you touch it while you’re working on your computer, you’ll be grounded and safe to touch the other parts.
- Be patient and don’t panic – Every project has its challenges and your PC build is no exception. Luckily, it’s extremely likely someone has had the same issue as you and written about it on a blog or forum. Keep calm and fire up Google.
Hopefully these experiences from my first build will help someone else during one of those frantic searches, but I’ve missed anything or you have any questions, feel free to leave a comment – I’ll try my best to help if your problem happens to be something I’ve encountered!