

Parkitect: How to build a rollercoaster your guests will love
Chris Sawyer’s all-time classic RollerCoaster Tycoon will always be the king of theme park management games, but Texel Raptor’s 2018 title Parkitect does an amazing job of augmenting its addictive gameplay with the graphical fidelity and quality of life features you’d expect from a modern game.
Unfortunately, Parkitect’s guests are if anything more fussy about what they will and won’t ride than their RCT equivalents. I’ve built many a rollercoaster that has brought a creative vision from my head into reality, but failed to attract many paying customers and had to run at a loss or be shut down.
With that in mind, I thought I’d put together an article detailing everything I’ve learnt about planning, building, testing, and running rollercoasters in Parkitect to help others get it right the first time round.
Ride statistics
First, let’s take a look at what we’ll be judged on. While Parkitect attempts to simulate the chaos of hundreds of guests randomly making their way around a theme park, drawn from one shiny attraction to the next, as with any game there’s a lot of maths going on under the surface. In this case, every ride - rollercoasters included - is judged on three main metrics:
Excitement dictates how - well - excited your guests will get about your new ride, and increases the likelihood that they will show interest in it. It is dictated by the length of the ride, track variation, speed, and G-forces, as well as decoration and quirks like whether or not the rollercoaster goes underground. It is penalised if Intensity is too high or the ride is too short.
Now your rollecoaster has a guest’s attention, they need to decide if they want to ride it. Each guest has a preferred ride Intensity rating, against which they will assess the ride to determine whether it is too boring or too daring. High drops, G-forces, and speeds all increase Intensity, so you’ll want to watch out when designing your track - though there are some techniques we can use to keep it at an acceptable level, which we’ll discuss later.
Nausea, as the name would suggest, tells you how likely your guests are to throw up after riding your rollercoaster. It increases with the number of inversions and drops in your track design and the level of G-force riders are subjected to. Keep it at a moderate level to avoid overworking your janitors, and maybe keep a bin near the exit for those with weak stomachs.
I’ve been deliberately vague and given you just enough information to get a feel for rollercoaster building here, but if you want to know exactly how Excitement, Intensity, and Nausea are calculated (and therefore potentially spoil the game for yourself), Parkitect Wiki has an extremely detailed page with tons of detail, complete with equations and graphs.
Initial considerations
Starting to sound complicated? Don’t worry - we’ll walk through the ample tools Parkitect provides to help us manage these metrics in a little bit. However, we need to do a little bit of planning before we break ground.
First, carefully consider where you’re going to build the new ride. Unless you’re building a junior coaster or deliberately aiming for low intensity, it’s likely that a rollercoaster will be one of your park’s big attractions and draw in crowds. Therefore we want to place it somewhere it will bring people past less exciting rides and shops, increasing the probability that something will catch their eye and they’ll part with more of their hard-earned cash.
There’s also the subject of space. It would be incredibly tricky to build a new rollercoaster in an area populated with many other rides, so try to find an open plot to set it on. Although the exact track layout, drop height, and so on will change as you build, it’s good to have at least a rough idea of the type of coaster you’re aiming for so you can ensure you have enough space. There’s nothing worse than having to start from scratch because you keep hitting the park boundaries and having to compromise on your vision.
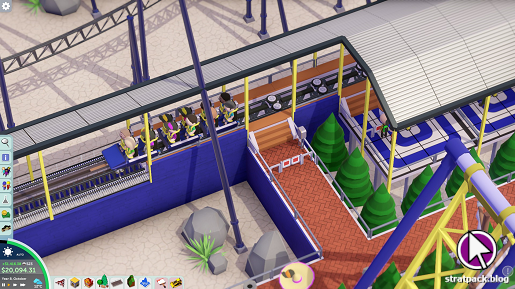
On a similar note, think specifically about where the rollercoaster’s station will sit. The station is likely to be the first segment of track you place, and therefore the hardest to undo without ripping everything up. It’s vital that you leave enough space for the entrance and exit, and that it will be possible to route paths gracefully over, under, or around the other parts of the track to link up with the main path and let guests in and out.
Designing your track
As you’ve probably guessed from my description of the metrics above (and, y’know, common sense), track design is the most crucial part of any ride. There are infinite possibilities here, and just because a rollercoaster is unorthodox or unusual it doesn’t mean it has a bad design. That said, there are some general rules you’re likely to want to stick to in most cases…
-
Most rollercoasters have a single lift hill (or powered launch) at the start of the ride. After the first drop, the train is carried by its own momentum through subsequent hills, drops, inversions, etc.
-
Keep the track design varied, with different turns and drops and special track elements. Guests don’t want to ride the same loop five times in a row (and that’s probably too intense for most of them anyway)
-
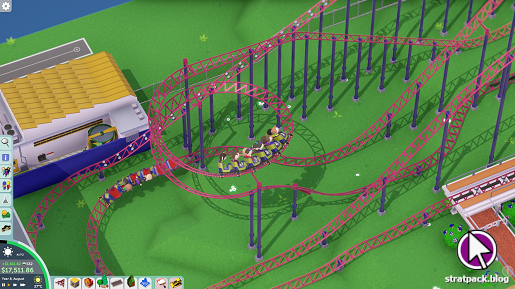
Try to intertwine the track with itself and those of other rides. This doesn’t seem to offer an Excitement boost like it used to in the classic RollerCoaster Tycoon games, but it looks more interesting and it means nearby scenery can easily contribute to multiple rides’ statistics
-
For fast corners, use longer track pieces, gentler curves, and banking. This reduces the lateral G-force your guests have to endure - they’ll thank you for not being shunted from side to side
-
Implement block brakes to divide the track into sections. This increases the number of trains you can use and stops them from crashing into each other if a train gets stuck. Just make sure the train can gain enough momentum to complete the track after the brakes are released (e.g. don’t put block brakes right before a loop)
-
Put block brakes before the station, always. If one of your coasters ever has an unexplained crash, it’s likely because the station brakes failed and another train arrived at speed, colliding with one loading passengers
Tests and measurements
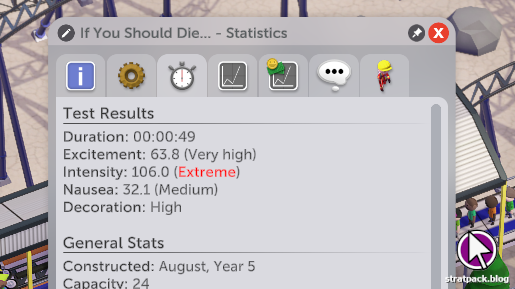
As you build your rollercoaster, Parkitect will send a phantom train around the track to show you how it fares. For this reason, it can be useful to open the ride dialogue box and set the number of cars to that which you intend to use - otherwise you might be in for a shock when the ride opens. Each time the ghost train completes the track (or the portion of it that exists), the current Excitement, Intensity, and Nausea metrics will be displayed, which should give you advance warning of any problematic elements.

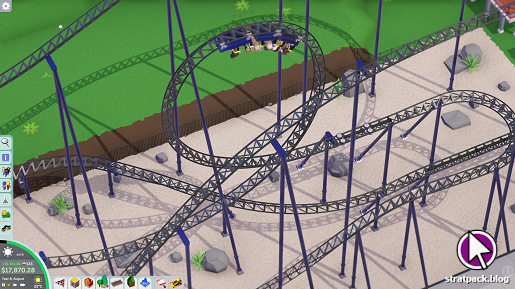
Your other best friend when diagnosing issues - which usually centre around surplus Intensity - is the overlay function, pictured above. This feature, found under the Graphs tab of the ride dialogue box, shows you the exact G-force levels at each part of the track, with the extremes in each direction marked on the track in red and blue. Even a quick glance at the output should help to identify areas that contribute more Intensity than needed.
How you fix these issues is another question entirely and depends on the exact problem. However, high G-forces are generally remediated by smoothening out the track. Softening curves, using more banking, and reducing the size of drops and loops are all usually good moves when it comes to reducing the Intensity score and avoiding that dreaded and frustrating “<Ride Name> looks too intense for me!” guest thought.
Finishing touches and operation
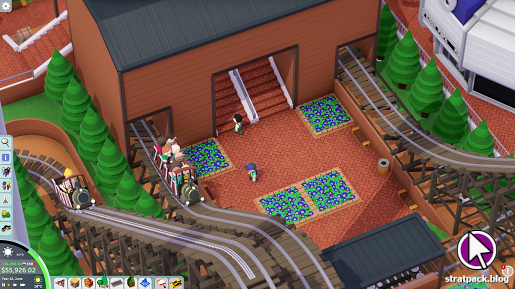
Once your trains can finish your track and the ride’s metrics are satisfactory, it’s time to think theming. Again, the only limit here is your imagination, and some people produce some fantastically creative rides, but to make your coaster as appealing as possible to guests you should place at least some decorative elements close to the track. You can see what Parkitect thinks of your efforts by checking the Decoration score on the Statistics tab.
Your last consideration before opening the rollercoaster is pricing. Parkitect’s default prices are very low, not least because guests are usually willing to pay quite a bit for a new ride with plenty of Excitement. This isn’t an exact science. There are a lot of factors at play and finding the optimal price requires some monitoring of queue length and guest thoughts (if you see “<Ride Name> is a really good deal!”, time to bump it up). I usually charge around $12 for my more popular rollercoasters, but the consensus online seems to be much higher and there are some very detailed explanations out there for those willing to invest the time to read up on it in detail.
At this point, you should have a thrilling, well-decorated rollercoaster, making a tidy profit by attracting crowds of guests with carefully calculated pricing! My final piece of advice is to keep an eye on your ride for a while after opening. Parkitect seems to simulate the weight of guests in the train, so a half-empty train with an uneven distribution of passengers might produce different results to your tests and lead to a stuck train. You did put those block brakes in to prevent another train arriving, didn’t you?
I hope this article has been useful in planning, building, testing, and running your latest attraction. If you think there’s anything I could add to this guide please let me know using the details below.